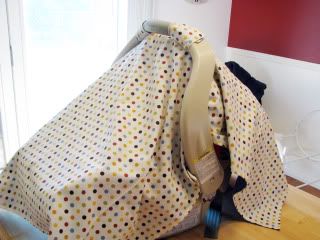
I saw one of these for the first time, a few months ago at the grocery store. It was darling! It was for a little girl and of course was embellished with bows and flowers and other girliness. I knew I was having a boy, and mine wasn't going to be anywhere near as cute, but also knew I had to go home and make one of my own!! Anyway, now that my little one is here, I whipped it together. Easy-Peasy Project, and so worth the time. In the summer it is fabulous to block out the sun and rain, and of course the winter it's perfect for keeping out snow, wind and unwanted strangers wanting to touch your little one!!
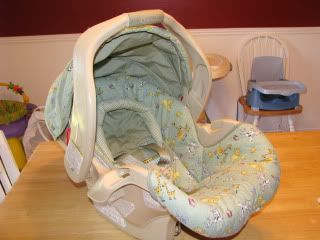
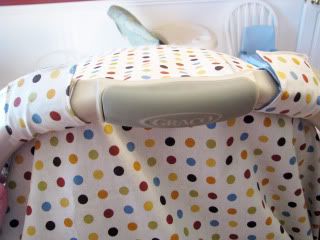
To start off you just need to figure out how long you want your tent to hang over either end. This is my car seat...
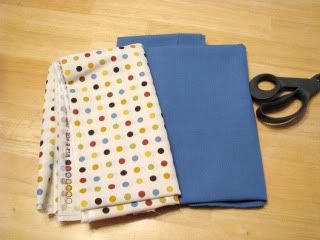
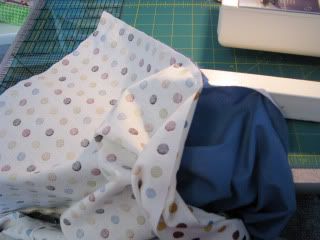
I decided to make my tent a yard and a quarter long. You need to pick 2 coordinating fabric pieces. I chose a polka dot pattern for the top, and solid blue for underneath.
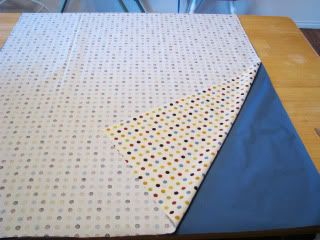
Next, cut them to the desired width. For mine I chose 31 inches wide. So it was 31 inches wide by a yard and a quarter long. Place them with there front sides facing each other and pin around the edges, leaving a small gap to be able to turn the fabric right side out when your done sewing. (Now that I'm done with mine, I almost think it would have looked better had I rounded the corners, to soften it a little bit. Now would be the time to do that if you would rather have the rounded corner look.)
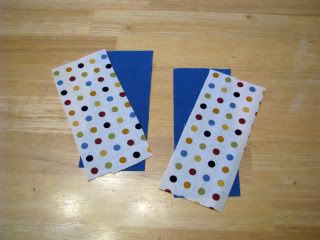
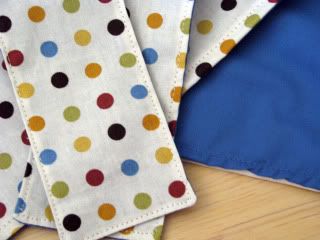
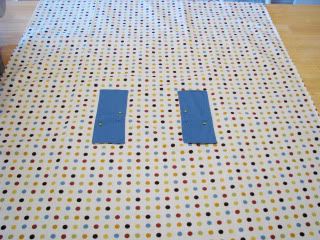
Next cut out 4 rectangular pieces for the straps to hold the tent to the seat. I cut mine 4 in. x 7 inches. You'll need 2 pieces in each fabric pattern.
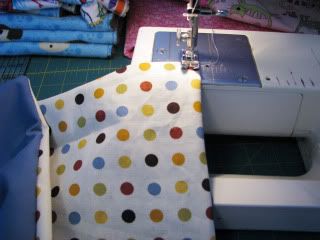
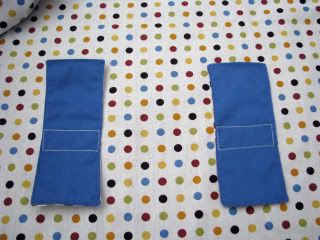
Now you'll want to sew around the edge of the entire tent and straps, and then turn them right side out.
Pin the hole shut, and sew around the edge of all pieces again. This top-stitch gives it a more finished look.
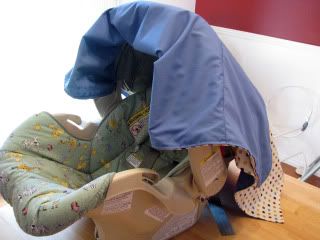
Now you'll want to take the fabric piece for the tent, and drape it over your car seat to determine where the velcro straps will need to go. Pin them in place.
After I pinned mine in place, I layed the fabric on the table and made sure the straps were even with each other. I ended up pinning mine almost right in the middle of the fabric, with each strap being 10 inches away from the edge.
Next I sewed them to the fabric in a rectangular fashion. I felt like this would hold better, rather than just sewing them on with 1 straight stitch. I even double stitched for extra hold.
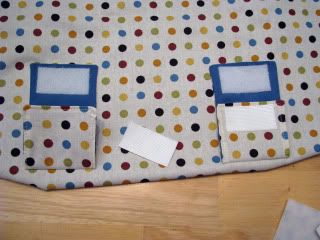
Next I added the velcro pieces. I just used the commercial grade sticky back velcro, since this tent wasn't going to be taken on and off. If I were making this as a gift or to sell I would have used the sew on velcro. Anyway, your choice.
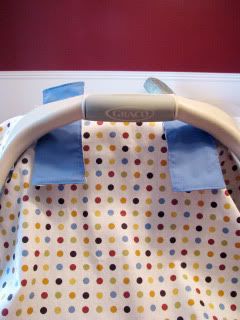
And thats it! Now you just velcro it on. Since this is for a boy there wasn't much embellishing that could be done. I probably could have added some giant size buttons to the top of the straps or something. For a little girl you could even use ribbon in place of the straps, and just tied the tent on with bows around the handle.


I'll be linking from mypetitepurse.blogspot.com
ReplyDeletethanks!
This is a great pattern! Thanks for sharing it with us.
ReplyDelete