If you are up to the mess, check out these Confetti Popper Rockets from Alpha Mom:
Fourth of July Confetti Popper Rockets
By Brenda Ponnay
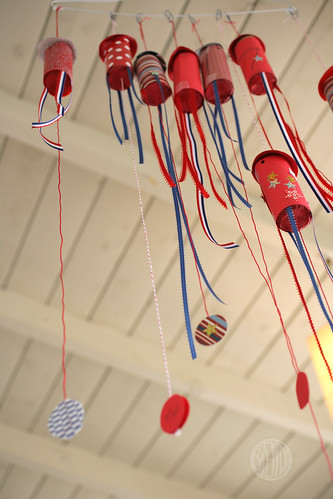
Who says you can't have fireworks in the house? With these confetti popper rockets you can blow things up inside without ever catching anything on fire! Explosive, yet completely safe and super fun for kids: That's how I like to celebrate my independence. Get your vacuum cleaners ready cause we're gonna blow this craft up!
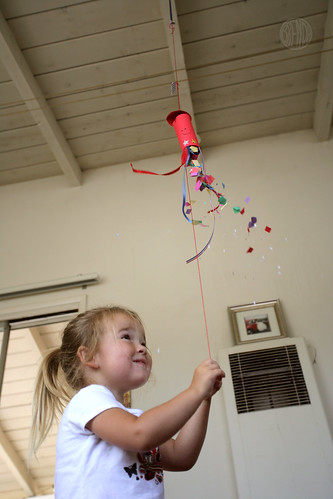
I know paper rockets have been made before but this rocket has a trap door in the bottom. When you pull the string, that dangles there ever-so enticingly at kid height, a small compartment opens up and a tiny bucket full of confetti will land on said kid's head. It's great. We tried it and my kid definitely gives this craft a thumbs up.
This craft is fun for many ages. My kid liked it because she got to decorate the rocket and what's not to love about confetti raining down on your head but I think older kids would really enjoy the engineering part of this project. You can get creative with it and maybe have a contest to see who can build the best rocket. Some explode spectacularly, some are a bit of a dud. There are lots of ways you can make these. They also make great decorations for a party!
Here's how you make it:
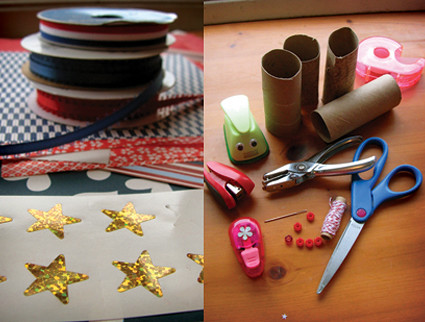
First you will need to gather your supplies.
- Paper towel or toilet paper tubes cut to rocket-like lengths
- colored paper (we chose patriotic colors and used everything from origami paper to scrapbook paper), make sure you have at least one sheet of something stiffer, like card stock too
- tissue paper (we used red)
- stickers and marker pens (feel free to get crazy here) to decorate with
- confetti (homemade or store-bought
- bakers twine or string
- tape
- glue (any kind that works on paper will do)
- beads (these will not show so it doesn't matter what they look like)
- ribbons for streamers
Tools you will need:
- a stapler
- scissors
- a craft or needlework needle
- fun craft punches for confetti (if you make your own)
- hole puncher
Now to build it! First you will build the "propulsion system." Of course this rocket isn't really going to take off and fly around the room but the confetti is housed where a normal propulsion system would be so we call it that.
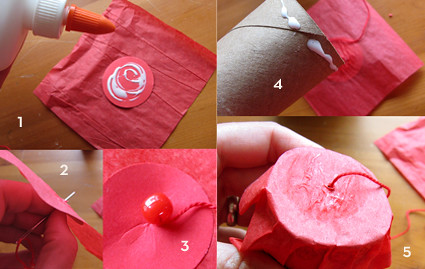
Cut yourself a small square of tissue paper that will be big enough to cover the bottom of your cardboard tube--about three inches across. Cut a small disc out of a sheet of card stock that will fit just within the radius of the cardboard tube. With some glue attach this disc to the center of your tissue paper. Let it dry for a few minutes. Thread about an arm's length of twine onto your craft needle and tie a bead to the end for a not. With this, puncture the center of your disc that is attached to the tissue paper. This is the trap door.
Next you will need to glue this tissue paper trap door to your cardboard tube with a small line of glue around the bottom of the tube. Make sure you attach it with the bead side inside the tube and the string (or fuse) side hanging outside of your tube. You can add a pull tab to your long dangling fuse or just let it hang. We added stars to some of ours. Let this dry and you're done with that part! Now onto decorating!
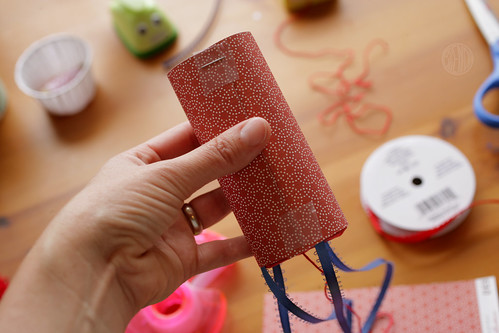
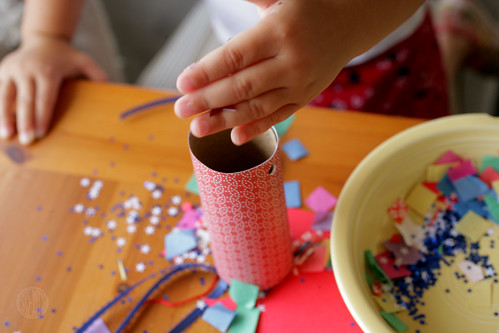
There are lots of ways you can decorate your rocket but the most important part is to cover the tube with some decorative paper so that you don't see that it used to be a toilet paper roll (or paper towel tube). This decorative sheet (roughly 6.5x4.25 inches big, depending on your tube) also holds your tissue paper trap door on, or at least covers the ruffles of tissue where it is glued to the tube. We attached ribbons to the bottom inside of our decorative covering so that the rockets looked like they were flying--or just pretty and festive.
Roll your paper around the tube and staple at the top for strength. You can't staple the bottom because your tissue paper trap door keeps the stapler from getting inside but I found that a couple of pieces of tape did the trick.
Now you can fill your tube with confetti. We just put in a few handfuls but feel free to load this sucker up. Just think about how much confetti you want to clean up later and act accordingly. I say the more the better but then I'm a bit of a free spirit who doesn't mind a little mess for the sake of some good old fashioned American fun.
Attaching the cone to the top of your rocket can be a bit tedious. It's purely aesthetic so if you opt out of this part that's totally fine. I just really wanted my confetti poppers to really look like old fashioned Fourth of July fire crackers so we made rocket cones.
Here's how you do it:
Cut a circle about 3.25 inches wide across, then cut one snip all the way to the center of the disc like you see above. Take the edges of your cut and pull them together, probably about a half an inch or more. When your cone has reached a desirable height, staple it at the base.
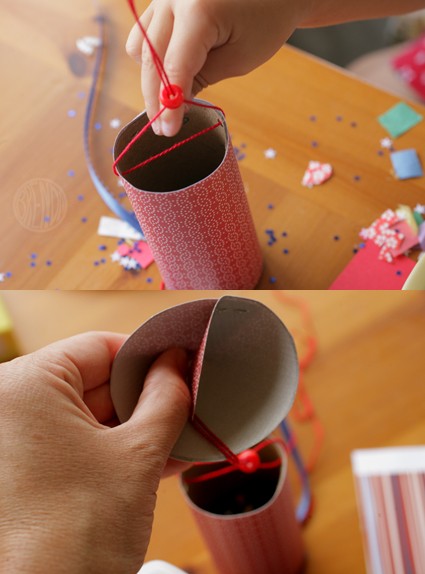
Now for the tricky part: attaching the cone to your rocket. The important thing here is creating a strong holder that you can use to hang your rocket from. Since these rockets will be tugged upon, it's important that the rocket holds together and doesn't come crashing down on your head instead of releasing it's payload of confetti. I found the best way to hang these rockets was to put the weight bearing string through two holes punched in the top of the rocket body. Then I strung the two sides of the string through a center bead (just to keep it centered) and up through the center of the cone so that it came out of the point or top of the cone. The cone itself can't really hold the rocket together so taping it wouldn't work.
An easy way to string the cone is to open up your stapled cut from the inside of your cone and pull your string through the gap. This will take some patience but you can do it!
Here's a super scientific diagram (it's rocket science hee hee!) in case you've gotten confused along the way.
Now you can hang them up and let the festivities begin!
I found that I needed to "prime" some of the rockets to ensure maximum explosiveness. You can do this by simply poking some small holes (or cutting with a sharp blade) around the bottom of the trap door. Just make sure you don't cut it completely out because the ripping sound of that trap door being yanked out is probably the biggest part of the fun.
That and the confetti party you can have afterwards! Woot!
P.S. I wanted to step this craft up a notch by adding those strings that pop with real explosives but I couldn't find any at the time of this writing. If anyone tries this, I'd love to hear how it goes. Of course exercise caution. I don't want anybody really burning down their house!








No comments:
Post a Comment