Showing posts with label Baby. Show all posts

Wednesday, November 17, 2010

Baby Carriage

Look how sweet this baby carriage is:

I originally saw it on Dannie's Designs. But she gives a link to the blog that she saw it on.

Friday, July 31, 2009

Dr. Suess Baby Shower


Oh my word! One day when I have lots of money, I will throw a party like this! Seriously, this is amazing! check out all the details over at Design Dazzle. It really is amazing!

Thursday, July 9, 2009

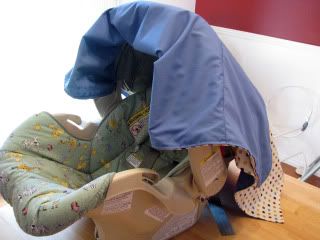
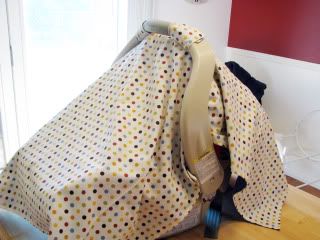
Car Seat Tent

I saw this on the Thrifty Chick. I wish I had the sewing skills to make this for my new niece Charly.

I saw one of these for the first time, a few months ago at the grocery store. It was darling! It was for a little girl and of course was embellished with bows and flowers and other girliness. I knew I was having a boy, and mine wasn't going to be anywhere near as cute, but also knew I had to go home and make one of my own!! Anyway, now that my little one is here, I whipped it together. Easy-Peasy Project, and so worth the time. In the summer it is fabulous to block out the sun and rain, and of course the winter it's perfect for keeping out snow, wind and unwanted strangers wanting to touch your little one!!

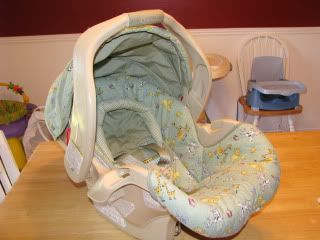
To start off you just need to figure out how long you want your tent to hang over either end. This is my car seat...

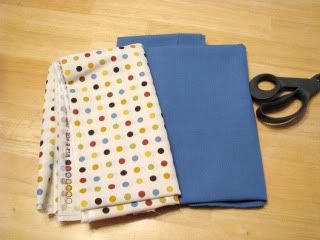
I decided to make my tent a yard and a quarter long. You need to pick 2 coordinating fabric pieces. I chose a polka dot pattern for the top, and solid blue for underneath.

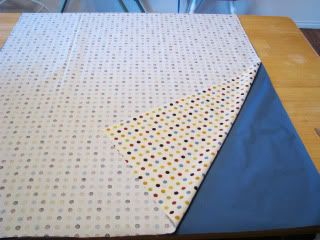
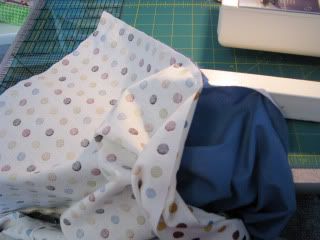
Next, cut them to the desired width. For mine I chose 31 inches wide. So it was 31 inches wide by a yard and a quarter long. Place them with there front sides facing each other and pin around the edges, leaving a small gap to be able to turn the fabric right side out when your done sewing. (Now that I'm done with mine, I almost think it would have looked better had I rounded the corners, to soften it a little bit. Now would be the time to do that if you would rather have the rounded corner look.)

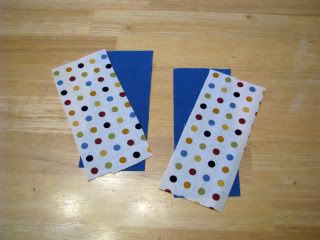
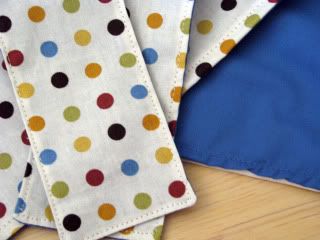
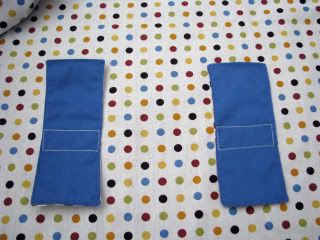
Next cut out 4 rectangular pieces for the straps to hold the tent to the seat. I cut mine 4 in. x 7 inches. You'll need 2 pieces in each fabric pattern.

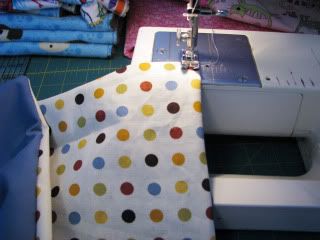
Now you'll want to sew around the edge of the entire tent and straps, and then turn them right side out.

Pin the hole shut, and sew around the edge of all pieces again. This top-stitch gives it a more finished look.


Now you'll want to take the fabric piece for the tent, and drape it over your car seat to determine where the velcro straps will need to go. Pin them in place.

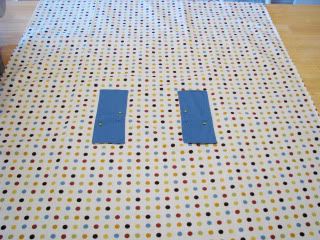
After I pinned mine in place, I layed the fabric on the table and made sure the straps were even with each other. I ended up pinning mine almost right in the middle of the fabric, with each strap being 10 inches away from the edge.

Next I sewed them to the fabric in a rectangular fashion. I felt like this would hold better, rather than just sewing them on with 1 straight stitch. I even double stitched for extra hold.

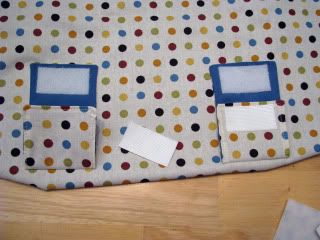
Next I added the velcro pieces. I just used the commercial grade sticky back velcro, since this tent wasn't going to be taken on and off. If I were making this as a gift or to sell I would have used the sew on velcro. Anyway, your choice.

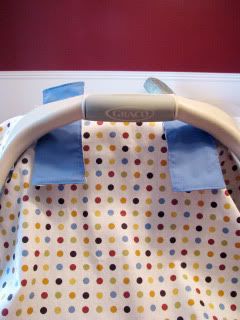
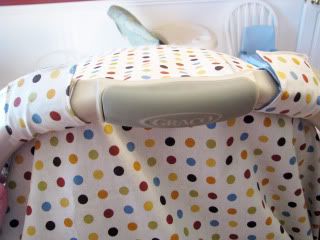
And thats it! Now you just velcro it on. Since this is for a boy there wasn't much embellishing that could be done. I probably could have added some giant size buttons to the top of the straps or something. For a little girl you could even use ribbon in place of the straps, and just tied the tent on with bows around the handle.


Thursday, April 30, 2009

Baby Celebrations

30 days has some more party ideas. This time they are baby shower ideas:

There are some amazing showers going on out there. Here are my favorites:
A baby sprinkle from Celebrations at Home
M. Writes' baby boy shower
Twin girl baby shower &
sweet baby shower from imperfect


My Insanity's She's About to Pop shower
Chasing Spayde's little birdee soiree
Project Nursery's backyard shower
Kara's party ideas' baby girl shower
dgoddess blog's baby girl shower part 1 & 2


Also check out:
Blissfully Domestic's baby shower round up
and Tip Junkie's baby shower category

Have you thrown a fabulous baby shower lately?

Saturday, April 11, 2009

Dirt Cake

This was a cute idea from Heather Dr:

For the baby shower, in addition to the cookies I made for favors, I also made a bugs-themed cake--you know, for dessert. :)


I used my big jelly roll pan (10.5 x 15.5") and made a gigantic chocolate fudge cake. And OK, I'll admit it. I cheated. The cake was from a box. Good ol' Betty came to my aid yet again. (It was good stuff.)

Once it was done, I did cut it into two layers. The filling? Oreo buttercream. Then I frosted it with vanilla buttercream that I colored bright green. I put a couple handfuls of Oreos through the food processor to make "dirt," and then spread that around on the top of the cake in a big rectangle. Then, using one of my Wilton piping tips, I piped all of that awesome looking grass onto the top edges and the sides. It was a bit of a pain in the ass, but it was worth it in the end. I absolutely loved how this turned out.

To finish it all off, I placed several gummy worms on top, then made a little sign with a quote on it that tied the cake back into the "baby boy" shower theme. "Boys are meant for kisses and hugs, for watching rainbows, and catching bugs."

Perfect!

We didn't stop with just a "dirt and grass" decorated cake. No, sir. On Friday night, when were doing the food preparation at my mom's, Marie and I also threw together a "real" dirt cake. And we served it right out of a bucket!

It was the cutest. Vanilla pudding, cream cheese, cool whip, butter... all mixed together and then layered with... you guessed it, more "dirt." The dirt for this dessert was made up of about 1.5 packages of Oreos. It was a lot of dirt!

Topped it off with more gummi worms and stuck a small bunch of fake flowers in it. Also made another little sign with another quote on it that related to boys and dirt. "Trucks and dirt and shades of blue, little boys are angels, too." Put together, and with the rest of our decor, it was really quite adorable.

Here is what it looked like once it had been mostly devoured. It was a huge hit! (Such a hit, in fact, that Kara's 6-year-old cousin told me she wished I was her mommy! *gasp* It was really sweet, I just wish she hadn't said it right in front of her real mommy!)

I wasn't sure how many people were going to want to eat the dirt cake AND the chocolate cake, but everyone wanted both. Since the dirt cake was kind of like "cookies and cream," it went really well with the chocolate cake--it served as a good ice cream substitute. In case you're interested in trying this out, I'll share the recipe that we used.

Dirt Cake
(Source: Allrecipes.com)

Ingredients:
- 1/2 cup butter, softened
- 1 (8 oz.) package cream cheese, softened
- 1/2 cup confectioner's sugar
- 2 (3.5 oz.) packages instant vanilla pudding mix
- 3 1/2 cups milk
- 1 (12 oz.) container frozen whipped topping, thawed
- 32 oz. (2 packages) Oreo cookies

Directions:
1. Chop Oreo cookies very fine in a food processor. The white cream will disappear.

2. Mix butter, cream cheese, and sugar in a bowl.

3. In a large bowl, mix milk, pudding mix, and whipped topping together.

4. Combine pudding mixture and cream cheese mixture.

5. Layer in flower pot or bucket, starting with cookies, then cream mixture. Repeat layers.

6. Chill until ready to serve.

7. Add gummy worms, artificial flowers, and trowel. Enjoy!

Thursday, April 2, 2009

Easy Hooded Bath Towel

I got one of these for Zetta when she was born. It is the best towel so it is used for all 3 of my kids. I now should make one for Connor and Tara.

From Make and Takes:

they make for great birthday or baby shower presents for others.

Bath Towel Hoody

Supplies for Bath Towel Hoodies:

  • one large bath towel - any color
  • one hand towel - any color
  • fabric for letters - can be anything. I use fleece and it does pill, but I don’t mind as it doesn’t fray.
  • scissors, pins, sewing machine
  • extras: ric-rac, double bias tape

hoody-supplies

First, cut your hand towel in half horizontally. Then lay out your large bath towel on the floor and center one of the cut pieces of hand towel on top of the towel. Put the cut side up, so that the sewn end in the one being sewn to the large bath towel, then you don’t have to fold over the edge.

hoody-cut-halfhoody-cut-side-up

Pin the cut hand towel to the large towel and sew in place. It doesn’t really matter how you sew them together, I actually like to sew them on top of each other, not right sides together. But either is fine.

hoody-ends-on-tophoody-pinned

Fold your hood together in half, pairing the cut side together. Sew this together. I don’t mind that the seams show and will fray a little after washing, this is the part that is on the inside and their heads cover that.

hoody-pin-hoodhoody-inside

You could be done here, but I like to add a few extras, a name or a shape to the back that I applique to the towel. I’m no expert and not a perfectionist, so most times the applique comes out a little wonky! I cut out letters/shape from fabric, pin them on, sew around each with a zig-zag stitch and call it good!

hoody-flower

I’ve also added some double-bias tape to my newest baby’s towel, down the sides and on the hood.

Hooded Bath Towel

Baby Hooded Bath Towel

Have fun making your kids some new towels.

Tuesday, March 31, 2009

Dishtowel Bib Tutorial

Great Tutorial on how to make Dishtowel Bibs from Create Everyday:

I would try to find a cuter dishtowel. But I love the ones like this that Amy gave me b/c it is harder for the babies to figure out how to pull off and b/c they are longer then a regular bib.


Tuesday, March 24, 2009

Binki Clip

I found a tutorial about how to make binki clips from this and that:


supplies:9 inch piece of ribbon (some people like it a bit longer. remember there will be a soother attached to it so that adds a little length)
a match or fire to melt the edge of ribbon
clip to attach to clothing with (i get mine from name tags that andy gets at work, hehe)
1 snap (4 parts)
a snap setter - i have a large one but you can pick up a little one for a couple bucks

1. seal both ends of the ribbon using a flame. do not let the flame touch the ribbon, just get it close enough to melt it as you move it back and forth.

2. thread one end of the ribbon through the whole in the clip, sew it approximately 3/4 inch from the clip. this is what the back will look like:


here is the front:


3. on the other end of the ribbon, secure one side of the snap with the snap setter. about 1 1/2 -2 inches away from the first snap secure the other side of the snap.

4. and you're done!!