Showing posts with label Sewing. Show all posts

Thursday, July 9, 2009

Car Seat Tent

I saw this on the Thrifty Chick. I wish I had the sewing skills to make this for my new niece Charly.

I saw one of these for the first time, a few months ago at the grocery store. It was darling! It was for a little girl and of course was embellished with bows and flowers and other girliness. I knew I was having a boy, and mine wasn't going to be anywhere near as cute, but also knew I had to go home and make one of my own!! Anyway, now that my little one is here, I whipped it together. Easy-Peasy Project, and so worth the time. In the summer it is fabulous to block out the sun and rain, and of course the winter it's perfect for keeping out snow, wind and unwanted strangers wanting to touch your little one!!
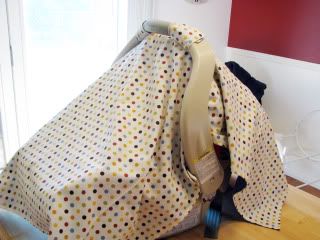
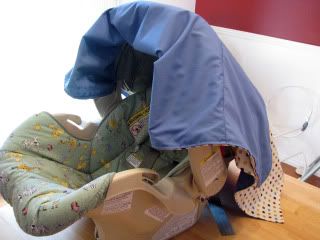
To start off you just need to figure out how long you want your tent to hang over either end. This is my car seat...
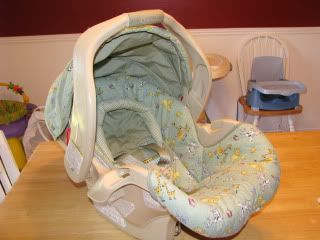
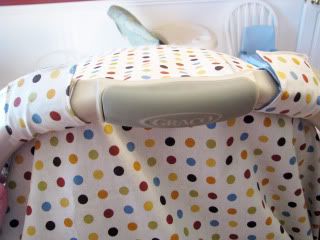
I decided to make my tent a yard and a quarter long. You need to pick 2 coordinating fabric pieces. I chose a polka dot pattern for the top, and solid blue for underneath.
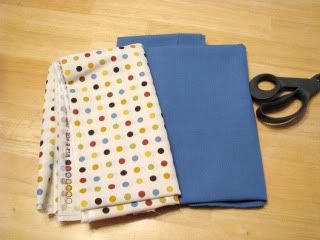
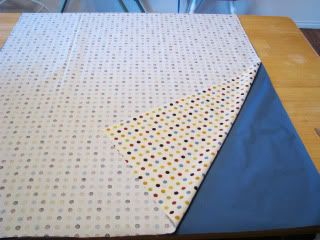
Next, cut them to the desired width. For mine I chose 31 inches wide. So it was 31 inches wide by a yard and a quarter long. Place them with there front sides facing each other and pin around the edges, leaving a small gap to be able to turn the fabric right side out when your done sewing. (Now that I'm done with mine, I almost think it would have looked better had I rounded the corners, to soften it a little bit. Now would be the time to do that if you would rather have the rounded corner look.)
Next cut out 4 rectangular pieces for the straps to hold the tent to the seat. I cut mine 4 in. x 7 inches. You'll need 2 pieces in each fabric pattern.
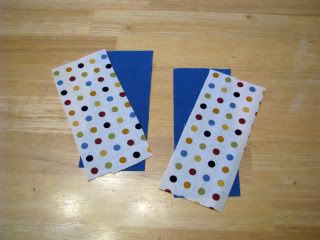
Now you'll want to sew around the edge of the entire tent and straps, and then turn them right side out.
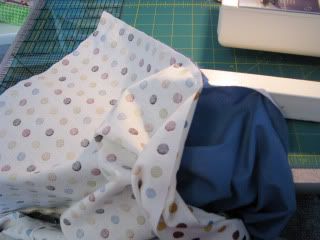
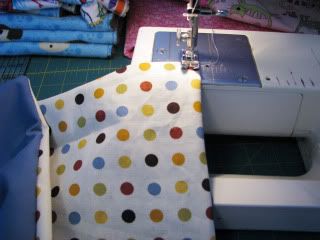
Pin the hole shut, and sew around the edge of all pieces again. This top-stitch gives it a more finished look.
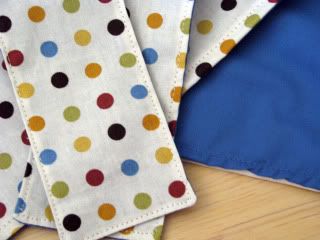
Now you'll want to take the fabric piece for the tent, and drape it over your car seat to determine where the velcro straps will need to go. Pin them in place.
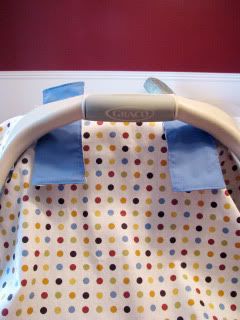
After I pinned mine in place, I layed the fabric on the table and made sure the straps were even with each other. I ended up pinning mine almost right in the middle of the fabric, with each strap being 10 inches away from the edge.
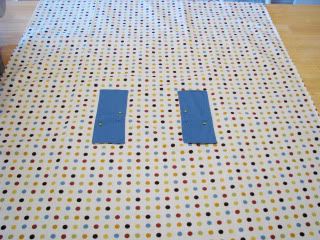
Next I sewed them to the fabric in a rectangular fashion. I felt like this would hold better, rather than just sewing them on with 1 straight stitch. I even double stitched for extra hold.
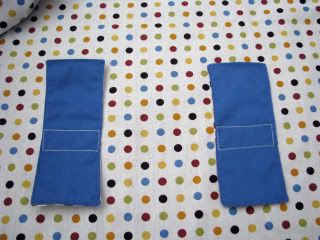
Next I added the velcro pieces. I just used the commercial grade sticky back velcro, since this tent wasn't going to be taken on and off. If I were making this as a gift or to sell I would have used the sew on velcro. Anyway, your choice.
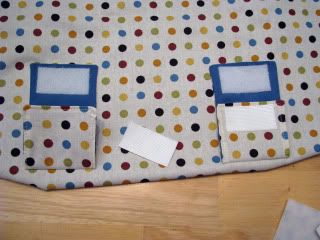
And thats it! Now you just velcro it on. Since this is for a boy there wasn't much embellishing that could be done. I probably could have added some giant size buttons to the top of the straps or something. For a little girl you could even use ribbon in place of the straps, and just tied the tent on with bows around the handle.
Thursday, July 2, 2009

All Things Lime

These women at the Secret Stitch Club are so cute! I LOVE the stuff they make. Sign up for a chance to win a free apron.

I love lime. With a sweet passion. Or a tart passion. Whatever way you see it. The color, the flavor, the fruit...I love it all. I've had this idea in the back of my mind for awhile to make Key Lime cupcakes with a Key Lime filling. Key limes were on sale so I picked up 20 for $1 and started searching for some good filled Key lime cupcake recipes. I found quite a few, but none were quite was I was looking for. So I combined and adapted recipes to fit my taste...a Graham cupcake (by Vanilla Garlic )with Key Lime curd filling (by Coconut & Lime) and a lime whipped cream cheese frosting (from allrecipes). I so loved the final product and wanted to share! Oh, don't worry. It's not just a recipe...if you make it to the end there's a giveaway too! Lime themed. :)
Filled Key Lime Cupcakes

Graham Cupcakes by Vanilla Garlic
Makes 20-24 cupcakes / 350 F oven

What You’ll Need...
1/2 cup of butter, room temperature
1 cup of sugar
3 eggs, room temperature
1 cup of milk
1 cup of flour
1 1/2 cups of graham cracker crumbs
1 teaspoon of baking soda
1 teaspoon of baking powder
1/8 teaspoon of salt

What You’ll Do...1) Beat the butter for about 30 seconds until well creamed. Add the sugar and mix for 3 minutes using a paddle attachment until light and fluffy. 2) Add the eggs, one at a time, being sure to beat for 30 seconds for each egg. 3) Place graham crackers in a food processor or in a plastic bag and beat the crud out of them until it's been ground into small crumbs and powder. 4) Sift together the flour, graham cracker crumbs, baking soda and powder, and salt. Add about 1/4 of the mixture to the butter mixture, then add some of the milk. Continue to add the ingredients in a dry-wet-dry method, ending with the dry. Continue to mix until just combined. 5) Scoop into cupcake papers, only fill half-way, and bake for 15-18 minutes in a 350 F oven or until a cake tester comes out clean.

Key Lime Curd adapted from Coconut & Lime
3 eggs
6 TBLS butter
¾ cup sugar
½ cup key lime juice
1 tsp lime zest

Directions:
Over low heat, melt butter in saucepan. Add the remaining ingredients and whisk continuously for 8-10 minutes, or until mixture becomes a custard. Allow to cool. It will thicken as it cools. Pour into a jar or bowl, cover and refrigerate.

Whipped Cream Cheese Frosting (with added Key lime zest) from allrecipes
1 (8 oz package) of cream cheese
1 cup of white sugar
1 teaspoon vanilla extract
1/8 teaspoon salt
1 ½ cups of heavy whipping cream
1 tsp lime zest

In a small bowl beat whipping cream until stiff peaks form; set aside. In a large bowl combine cream cheese, sugar salt and vanilla. Beat until smooth. Fold in whipped cream with cream cheese mixture. Add lime zest.

Putting it all together--

I use a really long tip (Wilton 230) to fill cupcakes. Just jab the tip into the middle of the cupcake and squeeze the curd into it. You know you have enough when the cupcake starts bulging on top. You can also cut a hold in the cupcake, fill it with the lime curd, and replace the cake.
Filled cupcakes.
Top it with the whipped cream cheese frosting and eat!

It seems like a lot of work, but it's really pretty easy. I made the key lime curd and the frosting the night before, so the next day all I had to do was make the cupcakes, fill, and frost. It's so worth it!

Now, in celebration of all things lime-y (is that a word??), we are giving away a Key Lime apron. Trimmed in ric rac, with a sweet bow and a pleated ruffle, this apron is perfect for baking (and eating) some Key Lime cupcakes in! Check it out:

You have three chances to win.
#1. Leave a comment telling us anything your heart desires. (Personally, I'd love to hear what your favorite cupcake flavor is...but whatever you wanna say, we'd love to hear!)
#2. Post on your personal blog about this giveaway and then come back a leave another comment telling us where to find it.
#3. Check out our Etsy site and then leave a comment telling us what you love. There are some new items up now, and more to come in the following weeks!
You will need to leave three separate comments to be entered three times. We will be using the Random Number Generator to determine the winner! You have until next Monday, July 6th at 11:59pm to enter. Good luck!

BONUS GIVEAWAY: Hey... this is Maren. I found this darling apron that I made for Etsy & decided it was too lime-a-licious to miss out on this fun limey giveaway so I decided instead of selling it I will just give it away for FREE (to celebrate me joining Etsy & Christie selling kids aprons). We will have a winner for Christie's green and white scrumptious apron above, and another pint sized winner for my "Cherry Limeade" child's apron. This is for a child size apron 2t-4t.

#4 - To enter for kid's apron, just leave a comment with your favorite summer drink and an email or way to contact you if you win!! Good Luck! Giveaway closes Monday July 6th 11:59 pm.

Sunday, May 24, 2009

DIY Fabric Memory Game

This is way cute! It would be so much fun to have a memory game of family photos. This is another one from Design Dazzle:


Vanessa made a photo memory game of her children with fabric scraps; this is such a fun DIY project. Photos from here.

Instructions to Make This Game!
You’ll need:
18 digital images, sized at 2 x 2 inches (if you don’t have photo software, try shrinkpictures.com)
6 sheets ink-jet-printable fabric
Scissors
1 yard 36-inch-wide wool felt
½ yard 45-inch-wide printed cotton fabric
Acid-free glue stick
Sewing machine
Zigzag pinking shears

1. Print out two copies of each picture on photo fabric; cut out the image, leaving a white border around all sides so that you end up with a 3 x 3-inch square.
2. Cut wool felt into seventy-two 4 x 4-inch squares.
3. Cut printed cotton fabric into thirty-six 4 x 4-inch squares.
4. To make a tile, stack the fabric layers as follows: Place the cotton printed side down. Place two layers of wool felt on top of the cotton. Then center the photo fabric, image side up, on the stack. Before you sew, dot a bit of glue between each layer to hold all four pieces together without pinning (a pin might leave a hole in the photo-fabric layer).
5. Machine-stitch through the tile layers around the outline of the photo. (The bottom layers are a bit larger than the photo fabric, so it’s easy to keep all the layers lined up.)
6. Trim all the layers of the tile at once with pinking shears, leaving a narrow white border around the image.
Instructions from Hallmark.com

Friday, May 22, 2009

Princess Hat

Since I know I will be having a princess party at some point in my life, I figured I should document this Princess hat from Skip to my Lou:

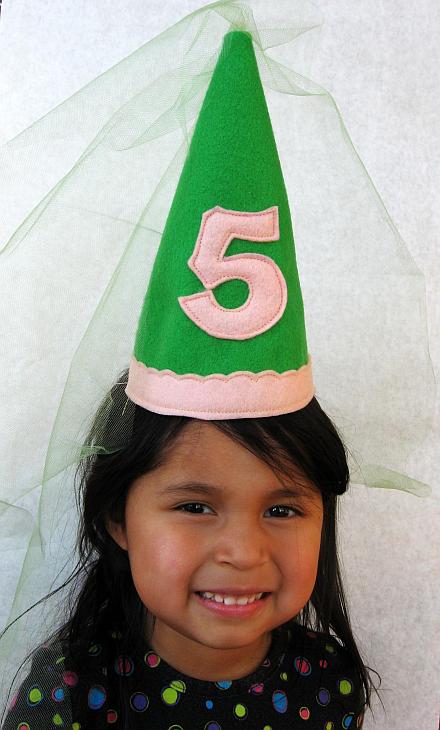
I was able to snap a shot of my daughter wearing the Birthday Crown yesterday, but she was hoping for something more girly and pink. This was all the pink felt I had and I was wishing for some hot pink tulle but she thinks her cousin will like it anyway!

princess-birthday-hat1

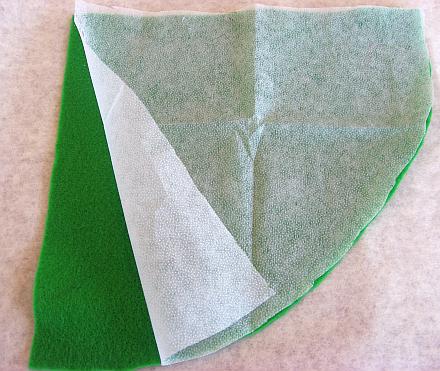
I cut the shape out of a sheet of felt, making it as big as possible. Then I ironed interfacing to one side of the felt.

princess-birthday-hat-1

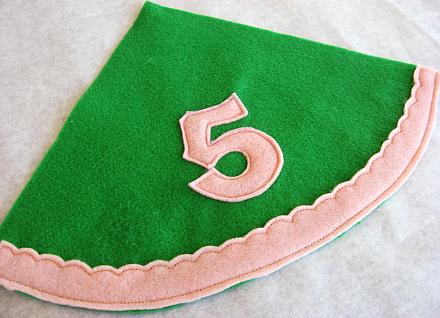
I embellished the outside by sewing on some felt details.

princess-birthday-hat-2

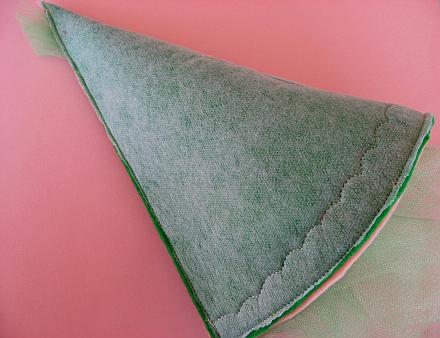
I cut 4 strips of tulle about 4 inches wide in different lengths. The longest was about 36 inches. Fold the felt right sides together and place the tulle in the middle with the end sticking out of the top. Sew as close to the edge as possible. Be careful to only catch the end of the tulle in the seam.

princess-birthday-hat-3

princess-birthday-hat-4Sew a piece of elastic string to the inside at each side. Turn right side out and there you go!

princess-birthday-hat-51

princess-birthday-hat-6

Monday, May 4, 2009

Easy Placemats

I found this great tutorial on how to make your own place mats over at The How-To Gal:

I am not a seamstress. I wish I was, but I'm not. However, true to How-To Gal's motto, this project is something ANYONE can do. I have wanted place mats for my new table but couldn't find ones that I liked. The time to take the plunge arrived and I made my own! Found two complimentary fabrics and created a double sided masterpiece!

What you need:

  • 1 1/2 Yards of 45" wide fabric two- different kinds (if you want double sided) The amount of fabric depends on the size of place mats you make and the number needed. I made six and had a little of each fabric left over.
  • Rotary Cutter/fabric cutting board
  • Sewing machine
  • Pins
  • Iron
  • 1-2 hours

Let's get started!

Cut fabric into size of place mats you desire. Mine are 16" x 8 "
Pin right sides of fabrics together

Sew around place mats with a 1/4" seam allowance. Don't sew it completely shut, leave 3"-4" open. Helpful hint: leave a side open as opposed to a corner-it's easier to complete the project.

Pull fabric through the hole to reveal the right sides

Sew up the hole

Iron flat. If you would like, sew around the edges again with a complimentary colored top stitch.

Fantastic place mats in the fabric of your choice!
(and yes, we do use mason jars as cups) :)

Sunday, April 26, 2009

Ribbon Capris

These Capris would look so cute on my little girl! I saw this at Make it and Love It:


I found these capri's at an "end of season" sale several months ago at Old Navy. That's one of my favorite hobby's.......finding a discount!! I only spent a couple of dollars on them and got a few different colors of ribbon to attach to the bottom. I used 11 pieces of varying width ribbon for each leg, cut them each 3 inches long, heat sealed the ends with a lighter, and then pinned them to the bottom of the capri's (while inside out), 1/4 inch apart.


I sewed around the capri leg once, and then another time, really close to the bottom edge.


Turn them right side out and let your little lady slip right into them. She'll love 'em.

Monday, March 30, 2009

Denim Picnic Quilt

Cool Denim Picnic Quilt by Little Birdie Secrets:
She has great directions on her site.

Thursday, March 5, 2009

Bandana Skirts

Found this on U Create. I love the little skirts. I think I am going to have to make those for summer!

Check out these ideas to make for your little girl!! I'm gonna have so much fun making a couple of dresses and skirts. They are super easy and so fun for spring/summer! The bandanna dress was created by Tanya, here. She made this in 15 minutes!
This darling bandanna skirt tutorial is found at V and Co., here.
If you want to check out my other post on bandannas (on how to make a tablecloth or apron), go here.

Wednesday, February 18, 2009

Car Seat Cover and Hooter Hider

Tiff and Lani these ideas are for you:
My sister made me this car seat cover and a nursing cover like this one on little birdie secrets.